This post is a step-by-step guide to setting up NetBeans for JSF (Java Server Faces) web development. It shows how to configure NetBeans for auto-completion of JSF tags and the meta-data in faces-config.xml.
The following will be required.
- A DTD for faces-config.xml
- A JSF implementation
- NetBeans 4.0
Setting Up the Project
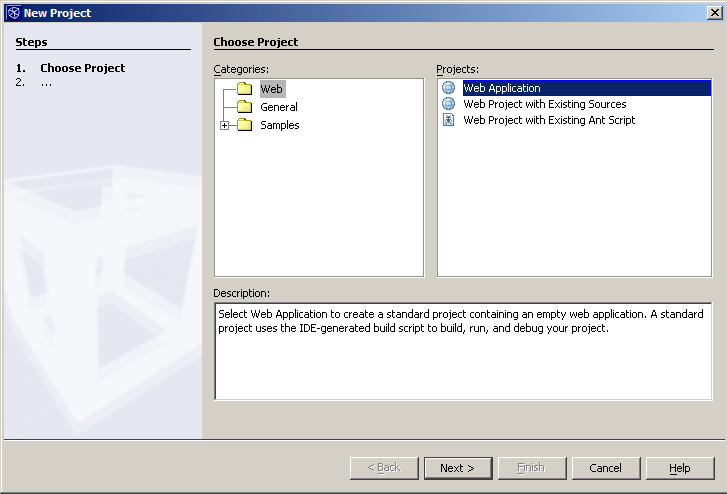
Create a new web project by selecting File > New Project… > Web > Web Application.
Creating a JSF Library
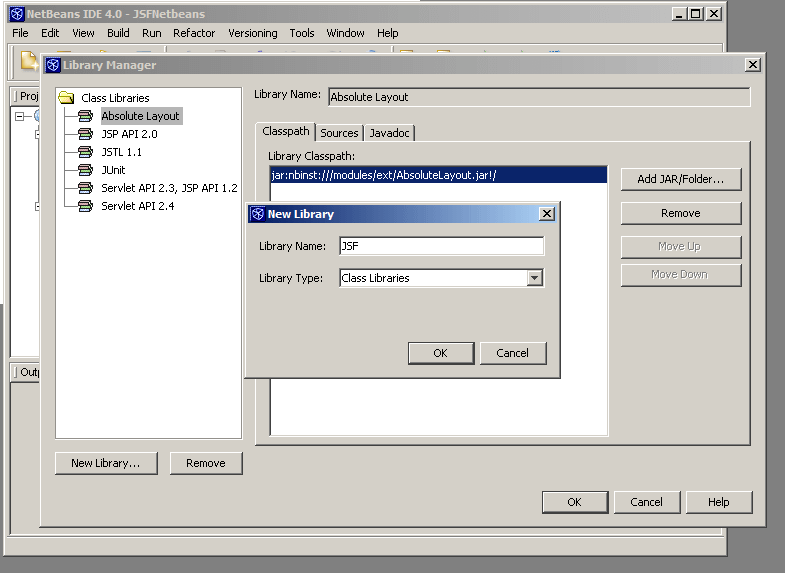
Create a library to contain JSF classes, tag libraries, etc. by selecting Tools > Library Manager… In the Library Manager, click on New Library, specify a name, and select Class Libraries as the type.
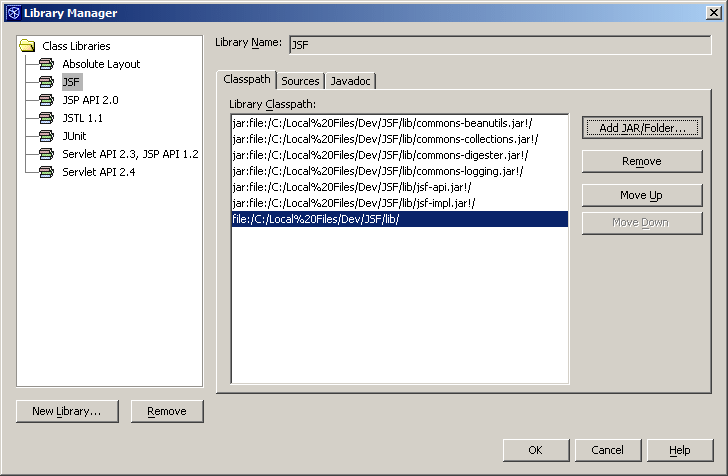
Select the library that you just created from the list and click on Add Jar/Folder; add the JAR files for the JSF implementation and required tag libraries.
Registering the Library in the Project
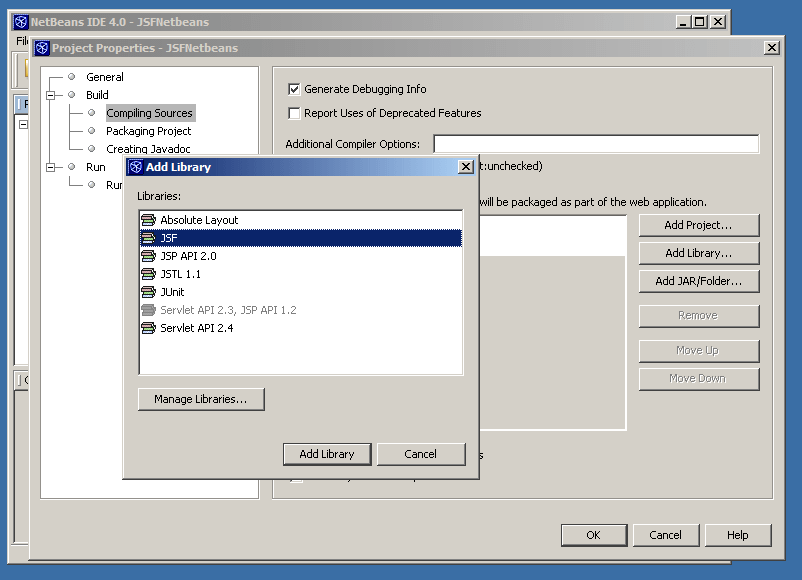
Right-click on the project and select Properties; select Compiling Sources; click on Add Library; and select the library that has just been created.
You also need to register JSTL in the project.
In order to include the files required for JSF in the final package, click on Packaging Project and add the libraries as in the previous step.
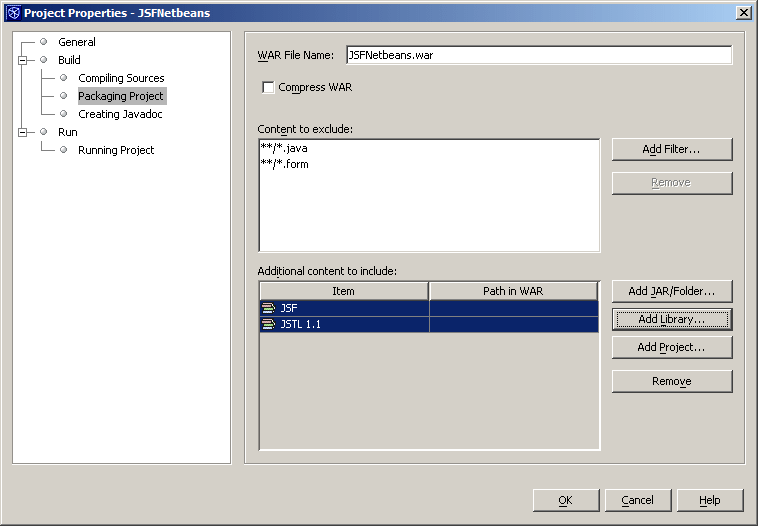
The JAR and other required files are now registered on the classpath for this project.
Creating faces-config.xml
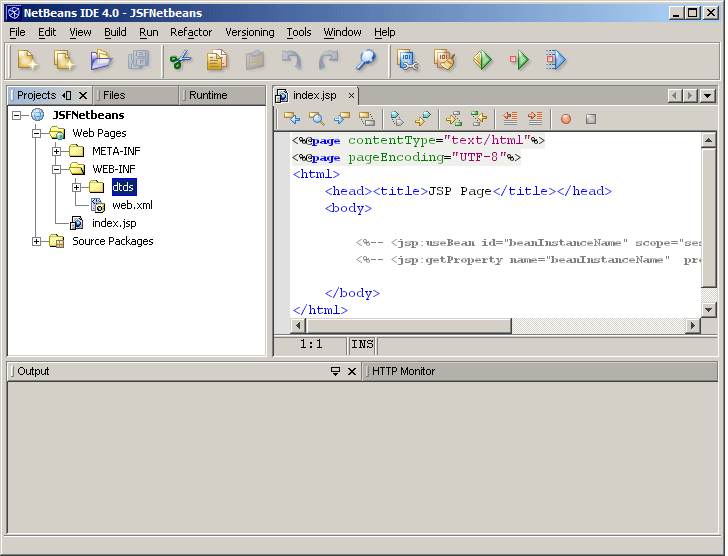
Create a new folder dtds under WEB-INF by right-clicking on it, selecting New > Folder, and typing “dtdsâ€.
Download the DTD file for Sun’s reference implementation of JSF and extract it in the dtds folder.

Tip: Use a file manager to do this. Files cannot be pasted directly into NetBeans.
Once this is done, create faces-config.xml by right-clicking on WEB-INF and selecing New > XML document, and typing “faces-configâ€.
Replace the content of faces-config.xml with the following:
<?xml version="1.0" encoding="UTF-8"?>
<!DOCTYPE faces-config PUBLIC
"-//Sun Microsystems, Inc.//DTD JavaServer Faces Config 1.0//EN"
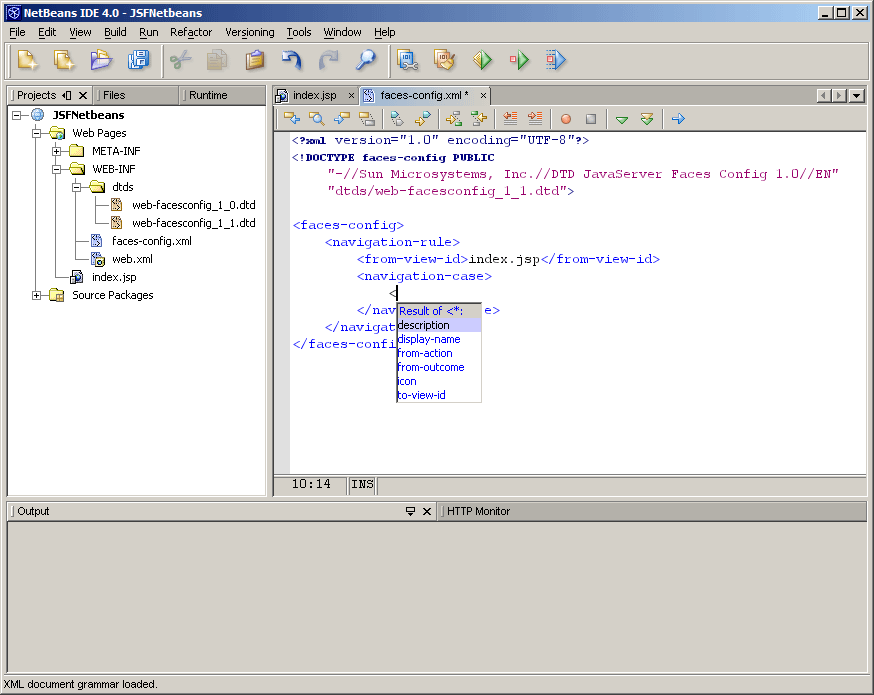
"dtds/web-facesconfig_1_1.dtd">Because we have copied the DTD for this XML file in the dtds folder, we specify this, as shown in the code extract.
The content can now be added, using the auto-completion if required.
Writing JSP Files
Right-click on WEB-INF and create a JSP file. Add the taglib directives at the beginning of the file. This will allow the editor to use auto-completion for JSF tags.

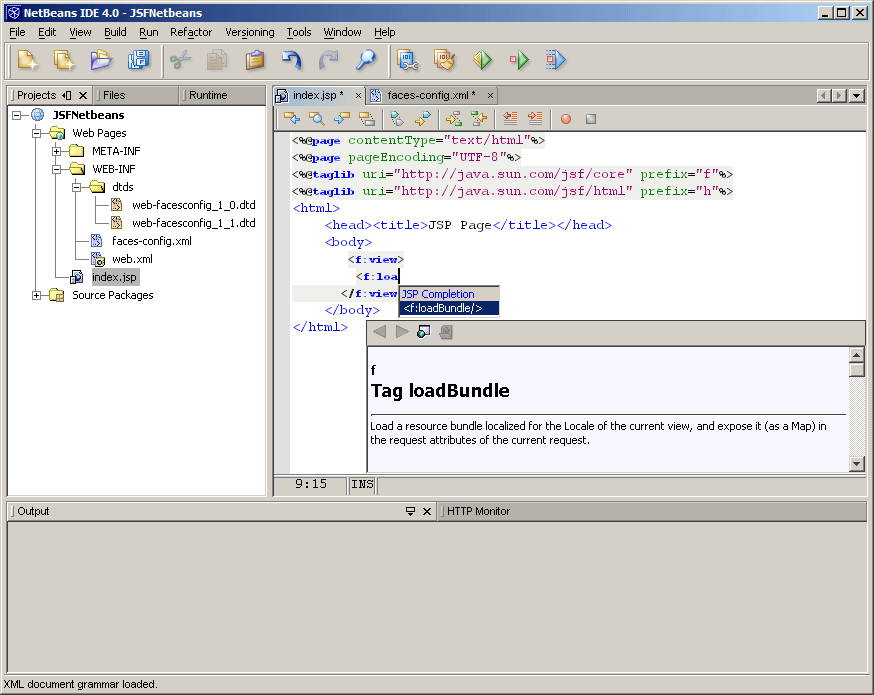
Note: The JSP editor says “JSP completion†instead of “JSF completion.â€
Conclusion
This tutorial shows how to work around the lack of native support for JSF in NetBeans.
Acknowledgements: NetBeans Community for a great IDE. Mike Cornell for that last yard.
I hope that you sended your nice tutorial to netbeans, for the IPOD contest
Great article, and thank you for posting this!
All these steps are now automatized in NetBeans 4.1, as the JSF libraries are part of the app server and netbeans automatically registers the JSF libraries in web projects, as well as registers the DTD for JSF faces xml code completion.
What is not there in nb 4.1 is a wizard to create a default faces config xml file, but the same step as in the above document can be done to create one. Or…:
NetBeans 4.1 also has the J2EE Blueprints Solutions Catalog embedded, and as such all the solutions that are using JSF are ready to be used as sample projects, completely configured: just add the project somewhere, and click run: the app server will start, the solution will be compiled, deployed and executed.
From there, you can modify it, learn it, debug it, and …copy paste some fragments to accomodate your own apps.
Ludo
NetBeans Technical Lead Ludovic Champenois commented on this article in a Sun internal email. Ludo’s comments are copied below, lightly edited for format.
Most of these steps are automated in NetBeans 4.1, now available in Early Access. The JSF libraries are part of Sun Java Application Server 8.1 Platform Edition, which can be downloaded free. NetBeans automatically registers the JSF libraries in web projects, and registers the DTD for JSF faces XML code completion.
What is not there in NetBeans 4.1 is a wizard to create a default faces-config.xml file, but the same step as in the above article can be done to create one.
NetBeans 4.1 also has the J2EE Blueprints Solutions Catalog embedded, and as such all the solutions that are using JSF are ready to be used as sample projects, compeltely configured. Just add the project somewher, and click run. The Application Server will start, the solution will be compiled, deployed and executed.
From there, you can modify it, learn it, debug it, and …copy paste some fragments to accomodate your own apps.
Sorry for the late reply. Thank you for your good words. I did not post it to the contest, but I think I should have. Just escaped me
I’ve been using NetBeans for awhile and found your article to be very useful. However, I’m new to JSF’s and when I follow your example step-for-step I get the following error when I try and run the JSP page:
The requested resource (/JSFExample/WEB-INF/test1.jsp) is not available.
Does the JSP have to go in the WEB-INF dir? If I put the test1.jsp page in the normal /JSFExample directory I then receive the following:
javax.servlet.ServletException: Cannot find FacesContext
Any ideas?
Thanks
Jon,
I think I may have omitted an important step, which is to map *.faces requests to the Faces Servlet. Please add the following to your /WEB-INF/web.xml configuration file, if you have not done that already.
There should not be any problem with the JSP file located under /WEB-INF, but as a general rule I do not do this, I would rather put it in the root directory or within a directory off the root.
Hello. I still have error after I tried everything. I got this kind of error:
HTTP Status 404 – Servlet FacesServlet is not available
type Status report
message Servlet FacesServlet is not available
description The requested resource (Servlet FacesServlet is not available) is not available.
Apache Tomcat/5.5.7
by the way, i’m using 4.1.
Obviously, you haven’t declared the Java Server Faces servlet in web.xml.
thank you very much !
i am a new programmer to jsf
this is extremely helpful for me
finally , thank you one more time !
You are most welcome.